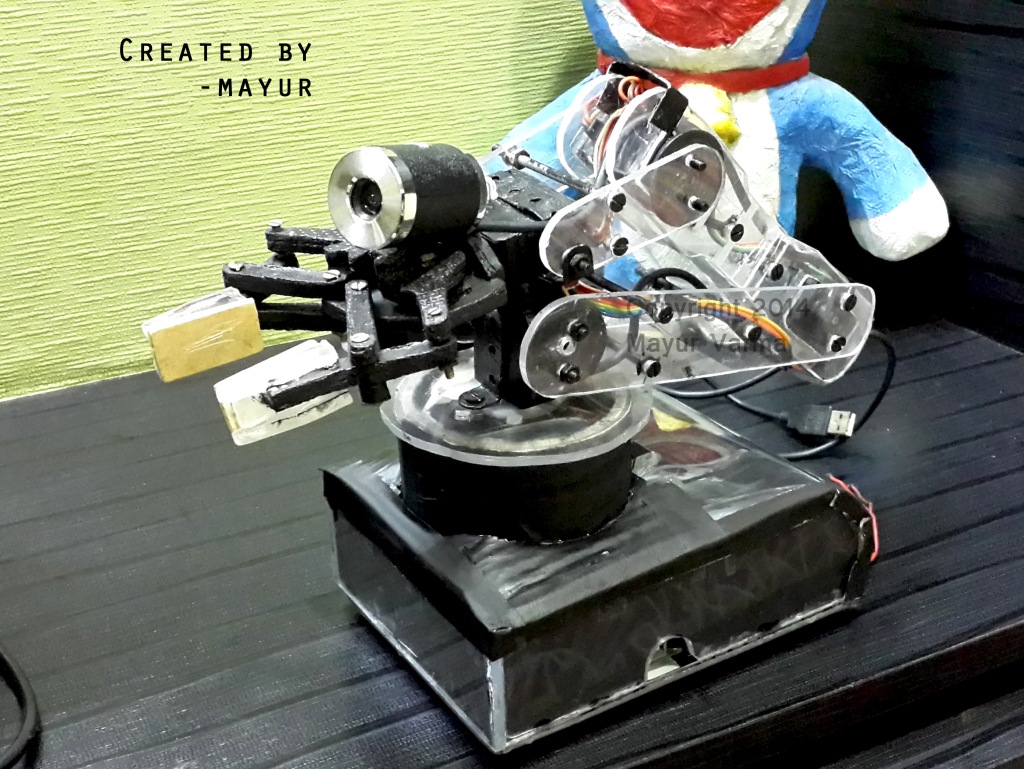

This is an Intelligent Robotic Arm with 5 degree of freedom for control.It has a webcam attached for autonomous control.The Robotic arm searches for the Object autonomously and if it detects the object,it tries to pickup the object by estimating the position of object in each frame. Once it has reached the object it picks up the Object.For this i have used Image based servo control technology.It can detect different color objects and sort the objects based on colors without any human intervention.
Video
Features
- 5 DOF Robotic Arm
- Autonomous
- Object Detection
- Image Based Servo Control
- USB Controlled
- Simple GUI with programming capabilities and can be controlled easily.
Software:
Simple Mode
For making the program for microcontroller i have used Avr Studio and for USB interface application i have used Visual C#.
The software has the functionality to program the robotic arm and allow it to run the sequence of steps.
Each servo motors can be controlled individually and it also include Inverse Kinematics which allows X,Y,Z parameter for controlling the robotic arm easily.
User can save the script and load the script created by them.

Autonomous Mode
It has autonomous mode and it can detect objects with the help of Image Processing.
For Image Processing I have used AFORGE.NET library.
The Robotic arm searches for the Object autonomously and if it detects the object,it tries to pickup the object by estimating the position of object in each frame. Once it has reached the object it picks up the Object.For this i have used Image based servo control technology.
It can detect different color objects and sort the object based on colors without any human intervention.

Things i used to make the Robotic Arm
- Plexiglass
- Nuts and screws
- wires
- Development Board with Microcontroller ATMEGA 640
- USB Cable
- Webcam
- Servo Motors
- SMPS for Power Supply
- Visual C#
- AVR Studio
- Autocad
Making of Robotic arm
1)I Made the diagram for all the parts of robotic arm in AutoCad and placed the print on plexiglass.

2)Cut the plexiglass according to the drawing with my dremel tool.

3)Drilled the hole for screws and started assembling the robotic arm

4)

5)

6)Assembling the parts was great fun.

7)Finally assembling was done and my homemade robotic arm was ready for the testing.

8)I created the program for microcontroller and computer to control robotic arm through USB and it was working successfully.

9)Removed all the papers from the plexiglass to give the finishing touch and attached the webcam to it.

10)Finally completed my well designed Intelligent robotic arm!!!!

UPDATE:(1st Oct 2016)
Finally just after two years I have released the source code for my Intelligent Robotic Arm licensed under MIT license.
You can check the repository at https://github.com/mayurvarma14/Intelligent-Robotic-Arm
Contact me at +MayurVarma

Leave a comment